Well...I went and did it. I mentioned in another post about wanting a Viridian C5L before getting an Inforce APL. Well, after a little searching online I found out there was a guy right around the corner from me wishing to sell his unit since he rarely shoots anymore. The offered price was very generous considering the retail is upwards of $300 so I hurried to an ATM and went to see it for myself. After mounting it up, I'm extremely happy with it.
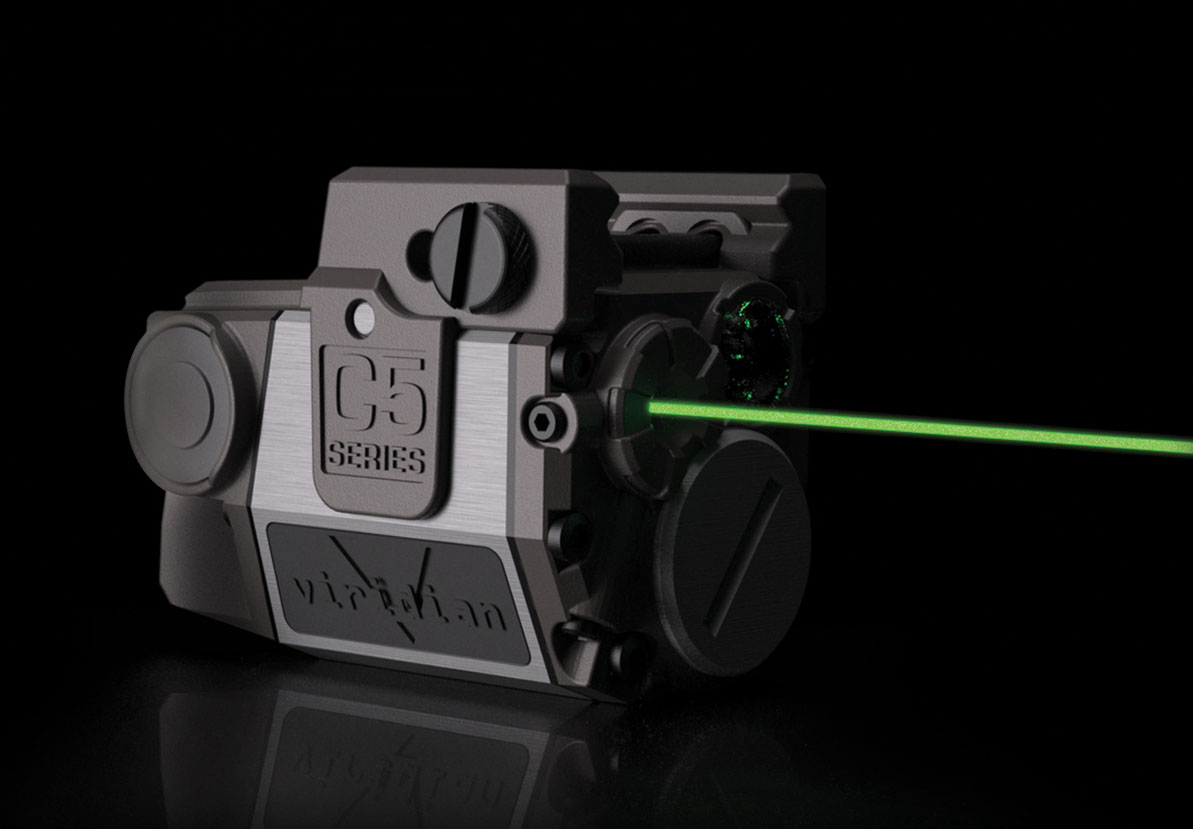
The guy had the original box and manual, an un-filed warranty card (bonus!), a TacLok Glock holster, all mounting hardware, and of course the C5L itself. The unit and everything included looks brand new so I believe his claim of rarely using it. The C5L is a very compact unit. The 532nm green laser is exceptionally bright and very easy to acquire even in bright light. My military weapon has a LA-5/PEQ ATPIAL which includes a red aim laser. While it's a great upgrade from the former separate PEQ-2 (IR) and PEQ-5 (Red), I often have trouble picking it up visually in daylight making the visible red laser worthless. I don't have much issue seeing the green dot of the C5L at 25yds in bright daylight, and at night, it's got an impressive reach. The only trouble there is that at night the beam can become air visible showing the beam from target to weapon. This shouldn't be a problem for anyone considering this is an overt laser/light combo.
As for the light, it comes in at 100 lumens. Half that of the Inforce APL's 200 lumen output. Is it bright? Yes! The 100 lumens sounds paltry at first look because most of the pistol lights out there are at 150-200 and occasionally more. However, take into consideration that this is a VERY compact unit. Sitting in a bright room, its still got shine, and a quick flash in the eyes will make you look away. At night in actual darkness it has a fairly bright center with a well defined and clearly lit halo of ambient light to see your surroundings. I have no doubt it will disorient any person it is shined on directly while still being bright enough to obscure everything behind the light.
As for construction, it feels very solid and well engineered. The various rail mounts slip into side pockets of sorts and are then screwed in to secure them. After sliding onto your weapons rail a simple rail locking bar is inserted and tightened and you are ready to go. You need 2 included hex keys, one for attaching the various mounts to the unit, and another to adjust your lasers point-of-aim. A screwdriver or a quarter can be used to tighten the rail locking bar or remove the battery, which is done from the front of the unit and does not require unmounting from the host. The activation switch is ambidextrous using a circular rubberized pad on either side which are very well placed and slightly sunk-in to prevent accidental activation. They press very cleanly and make no noise whatsoever.

SPECIFICATIONS
Here are the full specifications for the C5L:
Battery: 1x CR2 3V. 1+hour Laser/Light (high), 4+hour constant laser.
Beam: 532nm, 5mW peak output, Class IIIA
Divergence: 1.2mrad, 1/2" @ 50ft
Dimensions: 1.9" L x 1.46" H x 1.31" W
Weight: 2.34oz with battery
Weapons Mountable: check
MODES
Once turned on, pressing both activation switches at the same time will cycle through the available modes. When the desired mode is enabled, holding both buttons for 3 seconds
drops us into a deep programming* mode where the light output can be
changed from low to high, or laser pulse rate can be adjusted. We have:
- steady laser only
- steady laser and light (*low/med/high)
- steady laser and strobe light (*1Hz/20Hz/40Hz)
- pulse laser only (*1Hz/10Hz/20Hz)
- pulse laser and steady light (*low/med/high)
- steady light only (*low/med/high)
PRO's/CON's
Some may ask if a laser/light combo is overkill so let me throw some pros/cons out there for you to decide if they could benefit you.
Cons:
- Expensive.
- May limit your holster options.
- Give away your position if activated (Overt).
- Ruin's night adapted vision (pro against target).
- Require batteries / May fail to function.
- Adds weight to a weapon.
- Sight acquisition not required.
- Visualize effect of recoil and grip stabilisation on point-of-aim.
- Aid in follow-up shot placement.
- May disorientate or deter an attacker.
- Focus on the target vs sights (bad eyesight).
- Light mounted allows full weapon control, no offhand light holds.
- Light aids in positive identification of targets in low-light.
- Light bouncing can aid in low-light searching.
- Light may obscure activity/motions behind the light.
- Direct fires/mark targets for others (military).
TECHNIQUES
When I'm going over lights and lasers in military training I like to point out a few things. Generally, lights are for identification, while lasers are for engagement. While weapon lights are useful, you muzzle everything in its direct beam. A hand-light is still useful to have. Light bouncing, which is shining light off the ground, walls, or offset to illuminate an area can be useful in search without directly muzzling people or other things you don't want to muzzle. I tend to prefer staying as covert as possible and utilize light discipline, so I may only 'blink' a light to get a flash picture of my target or surroundings. Anyone observing one of these blink's might see where I am, but only for the instant the light is on if I'm moving instead of giving a constant target reference. Basically, a light shouldn't be on unless it is truly needed for the situation. A civilian might want to broadcast his position, but in the military we do not. If you are an NVG user, you shouldn't be using any light that is not infrared, and most NVG's have a built-in illuminator switch (PVS-14/18/15).
On lasers, a laser is not a bullet guiding end-all. Lasers do not identify targets, but do help get rounds on target during engagements. Proper platform and trigger discipline should still apply, but we can get away with a lot more using lasers, like shooting from the hip. Visible lasers are poor in daylight, and like lights, shouldn't be kept on because they can still give away your position. IR lasers are great for being covert, but getting a good cheek-weld may be impractical with NVG's on. I encourage teams to use the pattern generator filters and pulse rate adjustments to differentiate between one mans dot and another’s to avoid confusion. Most of the military lasers also have a IR Illuminator which works like a flashlight, and this beam should usually be narrow, not flood. If using a laser to mark or designate a target for others, keep it to a bare minimum and remember that the visible lasers may alert the target. In some cases, it may be desired for the target to be aware of the lase, for escalation of force or for psychological effect. See image...
 |
| Escalation or psychological effect? Both? |
Whenever a new optic is used, it must be zeroed and the same is true of any laser. Your unit is almost a paperweight if you don't take the time to set a good zero. Several methods exist and each has its place.
Zero techniques for lasers fall into three categories. First is point-of-aim = point-of-impact (POA=POI). In this zero, I adjust my laser to overlap my bullet strike for a given range. On a pistol, this is best for 25yds since that is generally the max range a typical shooter would reasonably engage with a pistol with any expectation of good shot placement. I know some can and do shoot quite further, but, examples. The trouble here is that the zero is only good for that range when set. At these shorter ranges this won't matter much so this is fine for a pistol in my opinion.
The second zero technique is to co-witness with another sight. This is very simple method and field expedient. If I had a M4 with any zeroed optic or even iron-sights I can use those sights and adjust my laser dot to overlap with my already zeroed aim-point, fire a group, and adjust. It should initially be very close. You can also physically bore sight but that is a little more involved.
The third zero technique involves setting the laser aim point to be parallel with the bore. More correctly, this method's intent is to set a laser zero that is inside of 3" rise/fall of our ballistic arc out to it's useful range. So in this zero, we eliminate most of the range and windage error. POA will not match POI but will be sufficiently close at all ranges to put rounds on target. This is more desirable when using rifles or crew-served weapons where engagement ranges are possibly hundreds of yards. For example, if I zeroed my rifle with the previous POA=POI method at 25yds and tried to engage a 300yd target, I could be many feet off from the aim laser. In this parallel method, my dot should be within a small distance (< 3" max desired) from the actual impact out to max effective range.
CONCLUSION
I feel like I have made a great purchase at a great price. By mounting a combined light and laser, I get the best of both worlds. I hope that I may have at least provided some food for thought on dealing with the possibility of a low light encounter and how a light and laser can help to overcome some of the difficulties inherent to that situation. As ever, train train train. Take every tool, every bit of knowledge, and every advantage you can have with you.

Best buy! I hope to find myself a great deal like that. And yes, knowledge and training is a must for C5L or any firearms and accessories for that matter. Thanks for sharing your insights.
ReplyDeletegun store lavonia ga